


If you want to contact a partner repairer, here is the list.
You can also watch the video with english subtitles :
Caution : swapping PCBs only solves electrical and physical failures .
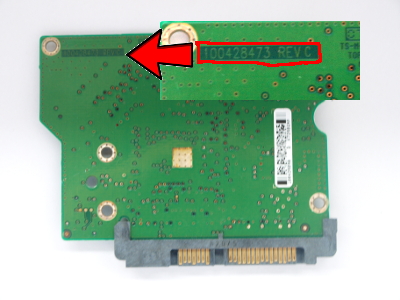
First, determine your PCB number, wich depends on your hard drive brand.
The number is written on the "flat" side, the side of the PCB without chips, in light green text on a dark green background. You will not even need to unscrew the PCB. See photo below. While talking about screws, if you do not have the right screwdriver, screwdrivers are also available for sale on this website.Generally speakling, you will need the T8 torx for fixed PC hard drives and the T6 torx for laptop PCs.
Once you have located your number start a search using this number,
Can't find your PCB on the site?
Contact us, we'll find your PCB at our supplier, this should take about two weeks.
Once you have found your PCB on the website, and ordered it, here’s how to install it
The method used to change the PCB also depends on the brands. There are 3 different categories :
Category 1: (1% of the discs dealt with)For Fujitsu, Maxtor, old Hitachi and Samsung, Seagate Barracuda format, simply swap the old PCB with the new PCB.
Category 2: (95% of the discs dealt with)For most Western Digital and Toshiba, the new Hitachi and Samsung, you have to transfer the ROM chip from the old PCB to the new PCB. It's a small 8-pin chip with a number starting with 25 -
Category 3: (4% of the discs dealt with)For some Western Digitals, Samsungs and more recent Toshibas , the ROM is included in the main controller,in this case you can do nothing without professional help, you should contact a data recovery company if this is the case. This is written on your product page : With ROM Chip = No
 |
| Bios Chip |
 |
| Main Controller |
Transferring the BIOS : (de)solder or flash?
As above, in order for the disc to work with your new PCB, it is necessary to transfer the
BIOS to the new PCB.
If you do not wish to go into technical detail simply order the service “ Transfer of the BIOS ”
(with or without the hard drive).
I used to only have one method : physically transplant the BIOS microchip from the old PCB
to the new one by soldering / desoldering. Now, in some cases, I have an alternative :
Flashing.
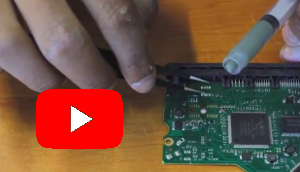
Method 1 : (de)soldering
This video shows a soldering technique that increases your chances of successfully
changing your PCB.
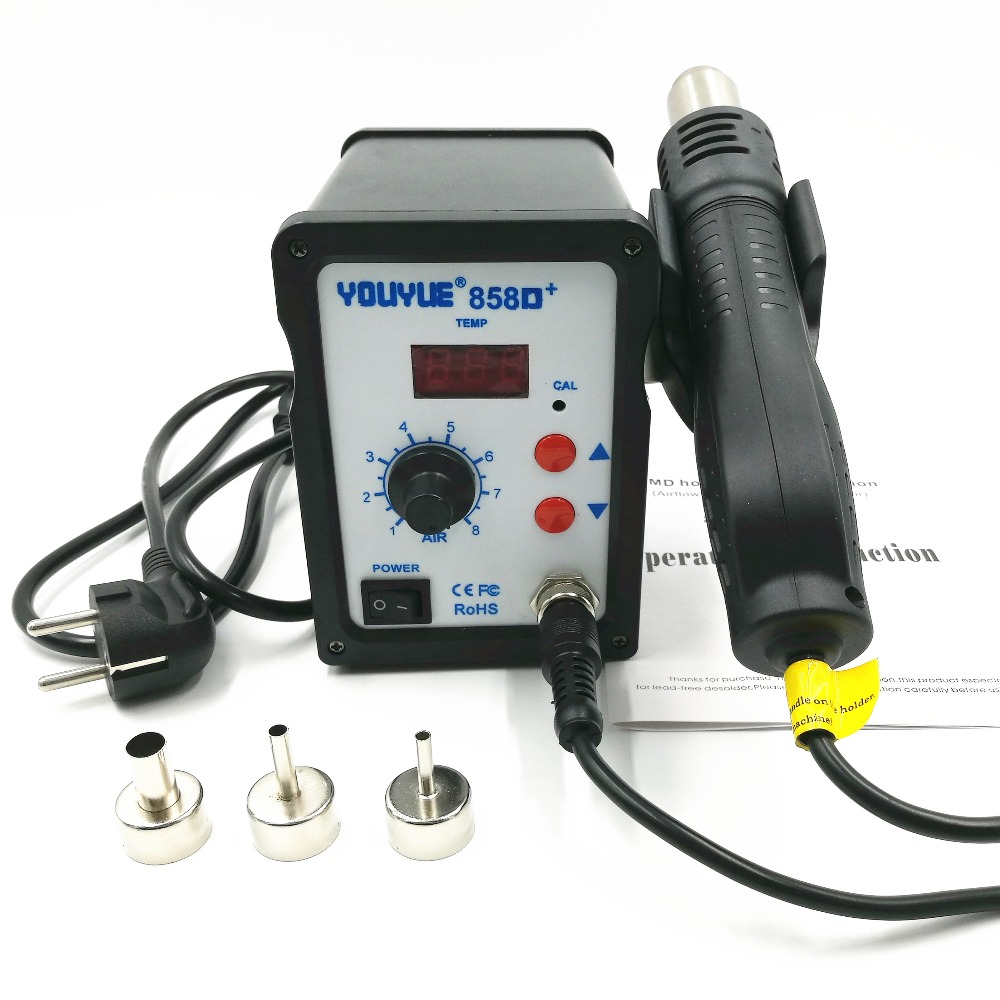
You will need a hot air soldering station like the 858D (€45 on Amazon, €37 on AliExpress) :
If you don't have one,you can give this part of the repair to a local phone repair shop it should cost 5-20 €. You can also send us your hard drive, or your PCB, we'll do the BIOS chip swap.
Once you can see the BIOS chip on the PCB, you have to:
- Heat the BIOS chip to un-solder it from the old PCB, using tweezers
- Do the same with the new PCB
- Fix the old chip on the new PCB
Return period: You are allowed to return a PCB to us (at your expense) without explanations within 14 days after receiving the order. You will be refunded by card or bank transfer. As soon as you heat the PCB for example to transfer the BIOS chip, the return will not be accepted.
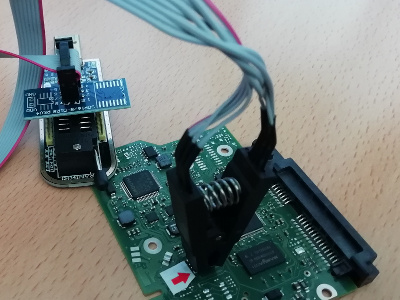
Method 2 : Flashing
I now have an alternative method that allows me to transfer information using a mini CH341A programmer and it’s clips .
This method explained above has advantages : the cost of materials is low, easy to use, but it has prerequisite skills : being able to pick up the BIOS microchip. This is not possible on all types of PCBs. I have therefore decided to list the flashability of my PCB stock. Do not hesitate to ask me by email whether a particular PCB is flashable or not.
To help you, you may watch this video : How to use a BIOS flasher w/ Test clip to flash BIOS chips in Linux & Windows
To sum it all up,
With Linux,
First instal flashrom :
sudo apt install flashrom
Connect the old PCB to read the info on the chip :
sudo flashrom --programmer ch341a_spi -r new.bin
Then connect the new PCB to write :
sudo flashrom --programmer ch341a_spi -w new.bin
If after all this you still do not have your files, check 2 things:
Your hard drive makes a normal sound, is it turning?
Is your hard drive recognised by the bios of your computer or the drive manager?
So you have a chance with Software data recovery